This is the 150th anniversary to the start of the Civil War, and I’ve been pondering over the last weeks what quilts I am going to make to commemorate that. We’re big on the Civil War in our house. We have watched the Ken Burns Civil War series four times now, and we will, no doubt, watch it again. We get together with a friend, make up a fun dinner, drink good wine, eat a luscious desert, and watch an episode. We just finished another go through this past year. Each and every time we are absorbed anew.
We fall in love with Lincoln, again. Joshua Chamberlain, too. We wonder anew over the oddness and brilliance that was General Sherman, the fascinating dichotomy of Grant and Lee. It amazes us every time at just how articulate people were back then – the letters and journals are so moving: funny, brilliant, heartbreaking. So, first off, if you haven’t seen this series, I could not recommend it more highly.
All of which means, of course, I’ve been planning some Civil War quilts for this year. Planning is perhaps too strong a word. I’ve been thinking about Civil War quilts. I had decided that at least one would have to be a sampler quilt. I was thinking four inch blocks.
Now, here’s the gift. I open my Google Reader this morning and what do I see? That Barbara Brackman is starting a blog for this Civil War anniversary with a bit of history and a relevant block posted each week. Eight inch blocks but, hey, I’m flexible.
Trip on down to the sewing room to begin the day and year by sewing up the first block. The block is entirely made of half-square triangles so I know what I’m going to do. I visit the Quilting and Whatnot website and download their paper-piecing units for half-square triangles. They have every (finished) size in quarter-inch increments from 3/4" to 2 1/2".
If you use these pdf’s, be sure to turn off the scaling on your printer and check the 1" square measurement to make sure you are on target.
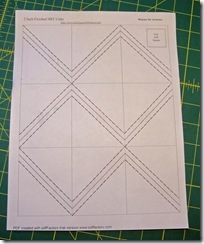
I knew what I needed in the way of light, dark, and medium combinations on the half-square triangles so I cut up the page to meet those requirements.

You’ll notice the numbers on the pad telling me what size I should cut the fabric to meet my triangles. Yes, there it is, the first official oops of the year. The measurements for the 4 half-square units fits one of those paper sections but not the other.
I use double-sided tape to attach the paper to the fabric (the fabric is placed right sides together). I find the tape holds the paper on without some of the distortion that pins can create.

The one to the top right was the oops. It was an easy fix though. I just split the paper in half and oriented it to the fabric I had cut.
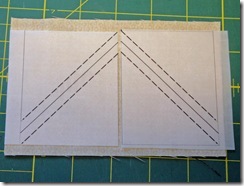
The next step is to sew on the dashed lines. As always with paper-piecing, I shortened the stitch length a little.

Once the lines are sewn, simply cut the undashed lines to form the individual units.

Remove the paper, open and press, and you wind up with this.

Trim off the dog ear and there you have it, a perfectly sized half-square triangle.

Here are all the units laid out and ready to assemble.

Ah, yes. This is where we get to the challenge part. Here’s the block all sewn up. It’s called Catch Me If You Can. Isn’t it pretty?
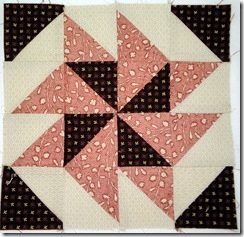
I think so. I also think it would be nice if it measured 8 1/2" square (as it should). But no, it measures 8 3/4". Yes. I got a whole quarter-inch off on an eight inch block. Ouch.
Challenge indeed. I love my Bernina except for this one thing: the quarter inch foot just isn’t exact on my machine. I forget sometimes and that gets me into trouble (see block above). So, it’s time for me to get my scant quarter-inch seams back on track. I’ll have to remake this block though, sad to say, I no longer have enough of that pink fabric to do an exact remake.
Still, I really like that block. Perhaps I can make a bag to store my blocks in over the course of the year and this can adorn the front. There’s a thought.
Meanwhile, what a great start to the New Year: a Civil War sampler provided by the always awesome Barbara Brackman and a challenge to fine tune my skills. I’m ready to go.
(Though I am wondering just how many tries it’s going to take to create a properly sized block. Wish me luck.)


