Monday, December 31, 2012

The Free-Motion Quilt Challenge

Whew!

January: Leaves

February: Feathers

March: Loops and Stars

April: Tulle Netting Design Transfer

May:  Railroad Tracks

June:  Filler Play

July: Boxes

August: Jester Hats

September: Feather Motif

October: Thread and Design Free Form

November: Spirals

December:  Kaleidoscope Kreator Feathers


What have I learned?

1) That I really love the potential for gorgeous design with free-motion quilting.

2)  I’ve got a lot further to go.

3)  But my stitches are getting more even.  Not there yet but I see improvement.

4)  I prefer really free design to tracing a drawn design.

5)  I think I’m on my way with spirals!  As with everything else, I’ve got a ways to go before I’ve got control, but they are looking a lot better.

6) Ditto for feathers!  I’m not there yet – not by a long shot – but I can see definite improvement.

7) I’ve learned that I can do this.  I can focus and practice and get better!

I’ve learned so much.  I’ve signed up for several Craftsy classes and I’m ready to keep going.  Thanks, SewCalGal – as always, you are an inspiration!

Kaleidoscope Love!

Here it is: the last day of the last month of the 2012 Free-Motion Quilt Challenge.  I was so excited when I saw the bonus tutorial for the month used Kaleidoscope Kreator.  I had bought this software and the feather add-on earlier in the Fall.  I’d been having fun playing with it but hadn’t quite tackled the “how am I going to use this in a quilt?” stage of things.

And then there it was: the very tutorial I needed!  SewCalGal encouraged those of us who had the program to create our own design, so, of course, I did.  Here’s just a few of the designs I created (well, the software did).

grey pebbles on blue

five feather star pebbles inner star

grey pebbles on dark brown 5

I really love to move that shape around and see how you can create distinct colorings in various elements of the design.

green and purple image

I think that would look really pretty outlined in purple thread.

Anyway, I decided to go for a light background on the feather – figuring this was a first try and I didn’t want to put a lot of printer ink to a design that might be a fail.  So, here the design is, printed onto fabric.

Here is is with the feather outlined in thread:

The fabric is a bit stiff as I think you can see.  I decided to pebble the background.

And I love, love, love how that came out!  I’m trying out some fabrics for borders so I’ll try and finish it up this coming week.  But meanwhile?  I am so ready to play some more with the software.  (Though, I have to admit, coming into the homestretch on those pebbles, I thought my eyes were going to cross!)

Sunday, December 30, 2012

Is it the New Year yet?

Okay, my goal was to get through the 2012 Free-Motion Challenge during 2012, and by golly, I do believe I’m going to make it.  I have one more month to do – that’s tomorrow’s task.  Here is the result of today’s (non-stop) sewing frenzy flurry.

First up was the lovely feather design that required a lot of back tracking.  I used the tulle tracing method.

You can see I traced it onto a white background and some black linen as well.  And here is the design quilted:

Ugh.  The flow is not smooth.  While my back-tracking is improving, it’s a long way from perfect.  What did I learn doing this design?  One: I need a lot more practice at stitching over a drawn design before I’d be satisfied with the results.  Two: I’m not highly motivated to practice this particular aspect of free motion quilting. 

It’s not that I can’t see the value in it.  I can.  But there are so many continuous line designs that are really quite lovely, I don’t see me choosing something like this instead.  Still, a learning experience.  Though I admit, I’ve already washed that design off the black linen since it’s clear to me I am not going to be quilting this up again. 

And then came the next month which was the exact opposite end of the spectrum: completely free-form.

Hmmm.  Feathers and me still have a long way to go.  That swirly thing in the lower right is meant to be a conch shell.  I’m not sure what it looks like exactly but a sea shell doesn’t leap to my mind.  I didn’t care for the grid in the lower left at all.  I do like the circles though.  While this little guy is a pretty good indicator of just how far I have to go, I like it as a record of where I’m currently at.  It’s also the direction that does interest me in free-motion quilting.  I like the idea of densely quilted varying designs put together. 

And then, one last push for the day: spirals.

First, there was drawing.  Lots and lots of drawing:

Sarah Vedeler provided the pdf’s with the spirals ready to trace.  That was a truly awesome thing.  It helped me so much to have those designs to trace, and then another grid to free draw my own.

Here they are quilted:

Yes, I’ve got a lot to learn, but so far this has felt like a great learning experience.  The instructors have been wonderful and I’ve learned a ton.  I’ve also signed up for Craftsy classes from three of the quilters and I’m looking forward to really diving into those in the coming weeks. 

In the spirit of Les Mis, all I can say is: one more day, one day more!

Saturday, December 29, 2012

Keepin’ On Movin’ On

I did set myself the goal of still finishing the free motion challenge in 2012.  I’m not sure I’m going to make it but I have been free motioning my heart out.  Today I got through another two months.

I did the layered boxes first.

Yikes!  Let’s see.  I didn’t realize till I got done that I had stacked the three across the top.  So much for looking like an overlapping design.  And I can’t sew a straight line yet.  That said, I liked the swirl pattern for this one and I look forward to using it in a larger work.  I like those boxes, too, though I need a lot more practice at them.

Then I moved on to the jester hats.  This one surprised me.  When I first started drawing it with pen on paper, I didn’t think I was going to like it at all.  I had a really hard time understanding how the pattern flowed.  But I drew and drew and drew, and several pages later, I finally started to get it.

After a lot of that, I finally risked actually sewing some jester hats.

So, my stitch length is still a major issue I need to address, and it’s clear I backed myself into a nasty spot a few times with this one, but ultimately, I really, really love this free motion pattern.  This creates some of the same effect as stippling only I like the way it looks a lot better.  I need more practice at this design to really feel comfortable with it but this is one I really want to master.

So, with the latest two “months,” I discovered two new background fills I really like and a new way of compartmentalizing the free motion (those overlapping boxes) that I want to try again as well. 

Very satisfying.

I sewed up the last of my table runner log cabins  and filled it in with jester hats.  They may be hard to see, but they’re there!

I think tomorrow morning it’s September. 

My how time flies! 

Friday, December 28, 2012

Still Trying

I decided it was time to move beyond just practice bits and onto a real something or other.  So, here’s my take on the June free motion challenge -- a design that will allow me to experiment with a number of different fills. 

I used a walking foot to stitch the circles and the straight lines.  Since I decided to work on linen, I really needed the stabilizing.

I cut out freezer paper circles, ironed them onto the linen, and then drew around them to create the circles. 

The SewCalGal Free Motion challenge has inspired me to sign up for several Craftsy classes, one of them by Angela Walters.  In one of the lessons she demonstrated a swirl design I really loved.  Isn’t it always the case that it looks so easy when the teacher is doing it, and then something else entirely happens when you try it yourself? 

Yes.  Well.  Here are my practice runs.

I certainly like the look of the spirals, but when I examine what I’ve got, it’s clear I’m a long way from even stitches and evenly spaced lines.  Still, after five practice runs, I decided to just move onto the linen.  I’m afraid if I wait till I’m actually good at this free motion stuff, it could be years before I accomplish anything!  It is what it is.  I’m going to call this Organic Quilting.  Because things in nature embrace imperfection, right?

So there it is with the first circle done.  I’ve been doing a little play with circle ideas in practice as well.

So, yes, there’s a heck of a learning curve ahead of me, but I’m still having a good time.  There’s a lot to do on that linen piece.  In addition to filling in all the circles, I need to fill in that background grid as well.  I’m waiting till the circles are done before I ultimately decide, but I’m considering a variety of fills for those. 

In any case, there it is.  It’s a start.  And I do think I’m going to learn a lot working on this.  It will be kind of fun to catalogue what I’ve learned once I finish this piece.  Well, fun or horribly depressing. 

No, no.  I’m aiming for glass half-full here.  Jeez, Terrie!  I’m sure it will be educational, fun, AND inspiring. 

Not to mention, organic.

Wednesday, December 26, 2012

Made It!

We all have our traditions, one of mine, apparently, is to always decide upon a last minute project or two.  I guess Christmas Eve isn’t Christmas Eve if I’m not sewing something to deadline.  This year I made a cute little purse/clutch for my sister-in-law and then forgot to take a picture before wrapping it.  Oh, well.  I liked the pattern and I’m going to make another one for me so that’s to the future. 

I also decided I needed a mini-tree skirt for our little ceramic tree.  I’m still in use it up mode so I went for some Xmas fabric I had lying around.  In fact, I think I’ve had it lying around for about twenty years or so! 

I think this project would look really cute in some of the fun Christmas fabrics currently in the store but this had the virtue of being cheap, convenient, and guilt reducing.  So, there it is. 

I used the GO! Dresden Plate die and followed the tutorial offered by Jo of Jo’s Country Junction.  The only difference is she used twenty-one blades and I used twenty (you can find my notes on sewing up the blades here: the candle mat doesn’t point the tips, obviously, but the advice on seam allowances is the same).

Here it is on my side table:

If you look out the window onto my deck, you can see that, yes, indeed, we did have a white Christmas!

I’m also continuing to practice free motion quilting.  A couple of my latest practice samples:

I still have a long, long way to go but those feathers are slowly improving.  I’ve learned that I really like the look of the little pebbles and the close together straight(ish) lines for the background fill. 

Of course, all of these are too tight for bed or lap quilts, but I’ll get there.

I hope that everyone who was celebrating yesterday had a lovely time of it.  And those who weren’t celebrating, I hope you just had a lovely time!

Meanwhile, the New Year looms.  I won’t be able to help myself: I see (bound to fail) New Year’s Resolutions in my future.  How about you?  Do you still make resolutions?  Do you actually keep the ones you make?

Thursday, December 20, 2012

Free Motion Challenge Continued

So, grades are in and it’s back to stitching.  So, first there was the April cool design transfer tutorial where you draw the quilt motif onto tulle netting.  I wanted a design that would fit the general mood of my log cabins better than the more formal design in the tutorial, so I pulled a design from the EQ add-on quilting libraries.

The design you see in the embroidery hoop has been traced onto the netting. 

I tried to trace the design onto the front of the log cabin block to begin with but for the same reasons that those log cabins are so forgiving of my stitching errors (I.E. the fabric is so textured you barely can see the stitching), I couldn’t see the design I traced.  That was a mess so I just flipped the block over and traced the design on the back.

Here it is stitched from the back:

And from the front:

I really like that technique.  For when I want to trace a design, I am definitely going to look to this option.

Then I moved on to the May tutorial with Leah Day.  First I did the practice stipple where you draw a big stipple and then loop over it.

I could see if I wanted some really tight stitching I might go for this but, generally speaking, this one is a little too messy for my tastes.  The next variation of the design instead of looping over the first stipple, you straight-lined it and created a railroad track effect.

That’s one out of focus photo!  No, wait.  I suspect the camera is not to blame.  Operator with shaky hands more like.  I liked this design more.  I chose it for my log cabin.  So, here it is from the back:

And from the front:

And now I’ve started the June tutorial which involves trying out a whole bunch of designs.  Here’s my practice run:

What have I learned from this latest batch of tutorials?  1) I really like using the netting as a way to transfer a design.  It worked great.  2)  I clearly  have a lot of practice ahead of me before I’m going to see even stitches.  3)  I like all these various back ground fills.

I’ve been cruising the web and finding all kinds of beautiful free motion quilting out there.  I have a long, long way to go, but there is a lot to inspire me.

The June tutorial quilting is a little too dense for my log cabin blocks so I think I’ll do up another practice (or two or three or .  . . ) and then do up a little mug rug or something like that. 

Isn’t this one of the great things about quilting as a hobby?  There is always some new direction to explore and there is always more to learn.  Fun.  Fun.  Fun.

Friday, December 14, 2012

“I Think I Can”

I think I can!

Do you remember that story from when you were a kid?  The story of the little engine and the big hill? 

Yes.  Well, I’m the little engine.  Free motion quilting is the hill. 

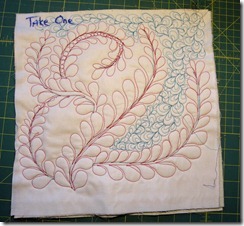
About those feathers . . . my first try.  (Mucho throat clearing).

As far my own story goes, we’re clearly in the early stages where the hill is b-i-i-i-g, and the progress up it is wee.  Still, I think I can.  So, I’m going to keep going. 

Here’s take number four:

You know, I think that is better.  Not good, mind you, but better.  I’m still practicing.  I’m hoping I’m determined.  Really determined this time.  And not merely hoping that books are like magic and if I just collect enough of them, I will somehow absorb their wisdom through osmosis.  Look at the collection of books on quilting I’ve collected. 

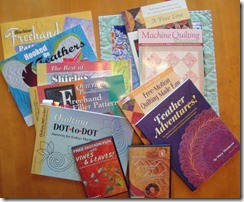
It’s not like I haven’t realized the need . . .

So, here’s the deal.  I recently bought the log cabin die from AccuQuilt – it was just released last month and I’m thinking this may be the best die ever!

I have two dresser drawers bulging with batiks.  I thought one way to double the pleasure, double the fun would be to use the log cabin die to use up some of those batiks while using the log cabin blocks to practice my free motion skills in quilt as you go mode.

So, I began by making up a few blocks.  At first I was only going to use the bottom half of the die, which would give me an eight inch block.

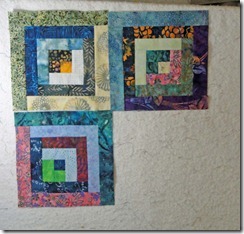
But that left me with an off balance block – with three logs to the side of the center square on two sides and four logs on the other two sides.  No, no, no.  My sense of balance and all things right in the universe can’t live with that.  So, now, after I cut the rectangle to lay on the die, I cut one extra strip to bump the log up to 9 inches square. I could use the GO! die for this but it is actually easier to just cut the extra strip with the rotary cutter. 

Balance!  Whew! 

My plan is to sew four log cabin blocks into a square and then freemotion them.  I’ll make up oodles, get lots of practice in, and finally sash them and get a new bed quilt out of it.  (Confession: one of the great virtues to all those batiks is that you can’t really see the stitching, so when I am less than wonderful in my execution, who will be able to tell?)   I did something like this for my son years ago, and it worked out quite well.  What worked once can work again.

Meanwhile, I am starting by doing just one block at a time.  I’ll make up six blocks, freemotion them one by one, and then sew them into a row, add borders on the long sides and then put these on a sofa table in my living room (it’s due for a change). 

I’ve done the leaf – January’s tutorial.

And the feather – February’s tutorial.  It’s a little hard to see but there is a feather in the middle (surrounded by echo quilting that leaves me thinking of oil slicks . .  . hmmm).

And some Ann Fahl inspired loops and stars, March’s tutorial.

For the record, here was my practice piece for the March free motion challenge.  I just practiced various bits.

And what have I learned from all this?  One: I am not a natural at feathers.  Two: you can free up a lot of bobbins by using the old leftover bits.  Three:  I need to keep reminding myself to move the needle faster.  Four:  at the stage I’m at, practice does not make perfect; it does, however, make for less imperfect.  I like to think I’m part way up that hill.

Tomorrow I am off to Joann’s to pick up some tulle and an embroidery hoop – and then it’s onto the April tutorial technique. 

I think I can.

We’ll see.